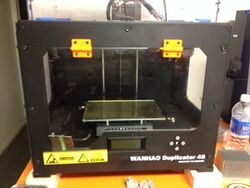
Tools: Wanhao Duplicator 4S: Difference between revisions
migrated manual, fixed category |
No edit summary |
||
| Line 86: | Line 86: | ||
[[Category:3D Printing]] | [[Category:3D Printing]] | ||
[[Category:Gone]] | |||
Latest revision as of 01:48, 9 January 2025

Tool Description:
Dual Extruder
ABS / PLA
8 x 6 x 6 build volume
Materials (what to use, and not use, it on):
- Prints using ABS or PLA filament
General and Special Safety Considerations:
This is not an exhaustive list!
- Read, understand and follow all warning labels, instructions and safety manuals.
- Take the class.
- Extruders and build plate are HOT: 100 C to 270 C.
Tool Use:
Unloading Filament
Filament unloading is a relatively tricky procedure and has caused a few problems on this machine. Failure to unload properly can jam the extruder, requiring it to be disassembled to clear the jam.
The root problem with unloading filament is that when the filament sits inside the hot end / nozzle area below the motor as the hot end heats up, it forms a wider blob of molten plastic. When this is pulled up through the extruder, it often jams and breaks off inside the motor assembly. We can avoid that by carefully melting fresh filament right before unloading.
Please follow the below process:
- Wash hands to remove any oils
- Remove the lid (and place it somewhere where it won't get knocked over)
- In the firmware utilities, select "Load Right" or "Load Left" depending which side you're unloading
- (Yes, "Load" not "Unload")
- (This will run the extruder motor forward when it is warmed up)
- Pull the black plastic tubing up from the extruder motor assembly so you can see and hold the filament
- When the extruder warms up and the motor starts, press down on the black plastic lever to the side of the motor and hold it down
- This disengages the drive wheel
- Now manually push the filament down into the nozzle / hot end of the extruder
- Plastic should freely ooze out of the nozzle as you push
- Push about an inch of filament into the nozzle
- Now quickly pull the filament up and out of the extruder
- This will give the cleanest tip and avoid blobs as it is pulled out
- Release the black plastic lever
- New filament can now be loaded
Loading Filament
Loading new filament is relatively easy. The only tricky part is that sometimes the filament curves inside the motor assembly and does not go straight down into the nozzle area.
Tips:
- Trim off any bent or melted end of the filament
- Straighten the filament as much as possible
- Make sure the filament is fed through the tube before going into the extruder
- Turn on the "Load Left" or "Load Right" utility in the menu and wait for the extruder to warm up
- Press down on the black plastic lever to disengage the extruder motor until you have the filament correctly positioned
- Wiggle and turn the filament until you feel it drop down into the nozzle area
- You should be able to press down on the filament by hand and see it extrude plastic from the nozzle
- If not, pull the filament back out, straighten it, and try again
- Once the filament is in place and oozing from the nozzle, let the motor push some filament through to clear the previous color out
Maintenance and Repair:
Glass Plate
The glass plate should be clean and clear without hairspray, glue, plastic residue, oils, etc. If necessary, wash with handsoap and dry completely.
There are replacement glass plates in the plastic drawers. Please email [info@tampahackerspace.com] if the glass needs replacing.
Extruder
Tips and Tricks:
- If corners are curling up, make use of mouse ear helper disks on the corners.
- In general, you should not need to do any special treatment to the build plate. If you are having problems with your first layers sticking, the build plate can be removed from the machine and sprayed with a light layer of hairspray. Do not spray into the machine. Be careful, the build plate may be HOT! (100+ C)
- If you are printing an object with close fine details that are positioned in a way that does not allow sufficient cooling before the next layer (small parts), it may help to remove the clear plastic cover and direct a small fan into the print area to facilitate faster cooling.
- To remove a print: wait for printing to stop and for the print head and bed to return to their home position. Place aluminum heat-sinks (typically stored nearby) on the print bed near your object. Be careful not to scratch the glass. After a couple minutes, the print bed will cool and the object will POP off the glass. Almost all prints should be able to be removed without scraping or prying, which can damage the glass.